
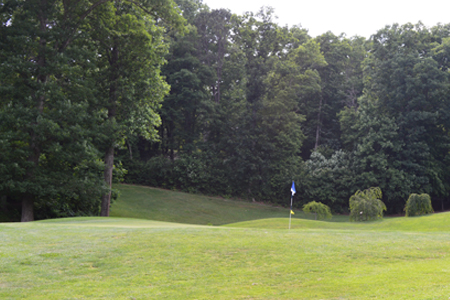
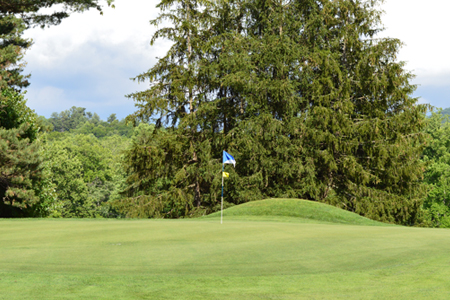
A golf course doesn't have to be long to be challenging and it doesn't have to be expensive to be memorable. Black Mountain Golf Course meanders quietly through the town. Unlike resort courses and country clubs the holes feel secluded amongst the trees and elevation changes. The traditional layout, with tee boxes positioned close to greens makes the course just as enjoyable to walk as it is to ride. A round at the Black Mountain Golf Course is a fun, fair and down to earth golfing experience. Even if your golf isn't spectacular the views most certainly are.
Hole 1 Handicap 6
Blue 349 Yards Par 4
White 333 Yards Par 4
Red 288 Yards Par 4
A straight away par 4 opening hole up the hill. Not as straight forward as it looks. A well placed tee shot just right of center will take the slope and roll left to the flat and leave you an uphill 2nd to a deep green. Avoid the fall off on the left side of the green.
Hole 2 Handicap 18
Blue 477 Yards Par 5
White 459 Yards Par 5
Red 449Yards Par 5
The first par 5 of the course. Only a well placed drive over the creek favoring the right side of the fairway will leave you an opportunity to reach the green in two. Bunkers left and right of the green guard the approach. When conditions are dry a well placed 2nd or 3rd can be played short of the green and roll down onto the green. Only a crisply struck iron will pitch and hold on the green.


Hole 3 Handicap 4
Blue 245 Yards Par 3
White 225 Yards Par 3
Red 168Yards Par 3
From the back tee the first of the par 3's is a stiff test. A deceptively tight line with a long iron or hybrid. The green slopes back to front and left to right as you approach with a steep fall off on the right side. Par is a very good score.
Hole 4 Handicap 8
Blue 359 Yards Par 4
White 334 Yards Par 4
Red 307 Yards Par 4
Take care on the tee box. Play for the right side of the fairway to open up your approach to a tight elevated green guarded by the large front bunker and a severe fall off to any approach pushed to the right.


Hole 5 Handicap 2
Blue 424 Yards Par 4
White 390 Yards Par 4
Red 280 Yards Par 4
Tight driving hole. Out of bounds left and a hazard running down the right. Aim for the left side of the large tree on the right side of fairway with a little draw. Leaves a mid to short iron to a small elevated green. An approach shot left short will roll back to the base of the hill leaving a tough up and in.
Hole 6 Handicap 14
Blue 300 Yards Par 4
White 291 Yards Par 4
Red 261 Yards Par 4
A short, but great par 4, with a blind tee shot. 6 is a dog leg left that makes a long iron or hybrid off the tee a good choice, leaving a steep up hill 2nd. A short iron approach to a narrow back to front green requires accuracy to avoid the steep bank on the right side of the green.

Hole 7 Handicap 10
Blue 288 Yards Par 4
White 278 Yards Par 4
Red 242 Yards Par 4
Watch for the angle of the tee box. Aim for the right side of the fairway with a gentle draw. An aggressive play is take 3 wood or driver and go for the green. An iron off the tee will leave a short iron in to a heavily contoured green.
Hole 8 Handicap 16
Blue 165 Yards Par 3
White 146 Yards Par 3
Red 128 Yards Par 3
An up the hill par 3, so club up. Out of bounds left, trees on the right. A ball hit short will run back to a bunker guarding the front of the green. Wait for the players ahead to clear the 9th tee box before teeing off.

Hole 9 Handicap 12
Blue 334 Yards Par 4
White 314 Yards Par 4
Red 259 Yards Par 4
A downhill par 4 to finish the front nine. Longer hitters can risk out of bounds left and trouble right and go for the green. An iron off the tee leaves another tricky 2nd to a severely sloped and small green. Birdies are rare on this great little par 4.
Hole 10 Handicap 17
Blue 137 Yards Par 3
White 127 Yards Par 3
Red 120 Yards Par 3
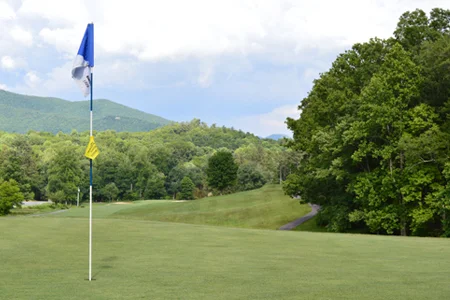
A gentle start to the back nine. A short par 3 down the hill. Don't let the views of Mount Mitchell distract you!


Hole 11 Handicap 5
Blue 408 Yards Par 4
White 376 Yards Par 4
Red 301 Yards Par 4
Challenging par 4. Driver off the tee using the slope on the right to feed your tee shot down to the flat. Beware though, the tee shot placed too far to the right will leave a 2nd blocked by the trees guarding the left side of green. Mid to short iron in to a slightly elevated green. Bunker right and drop off left. Par is a good score!
Hole 12 Handicap 1
Blue 431 Yards Par 4
White 337 Yards Par 4
Red 280 Yards Par 4
Another challenging par 4. Accuracy off the tee is paramount. A large tree and out of bounds right punish the slice and a severe wooded fall off to the left makes this a daunting tee shot. This hole is all about the tee shot, but once in the fairway the approach shot will be a mid to short iron to yet another small and deceptively undulating green!


Hole 13 Handicap 15
Blue 113 Yards Par 3
White 99 Yards Par 3
Red 85 Yards Par 3
Last of the par 3's. Ease you into the final stretch! Short downhill tee shot over the pond to a wide but narrow green. The center pin position is a beauty with only a few yards of landing area. Stay focused!
Hole 14 Handicap 9
Blue 390 Yards Par 4
White 381 Yards Par 4
Red 339 Yards Par 4
Beautiful par 4 down the hill. 3 wood or driver off the tee. If you have the length and can clear the hazard and trees the hole opens up to the left. Right side is tree lined and makes the 2nd more challenging. A good birdie opportunity. Take a quick look behind you after you have finished the hole. If the clouds haven't rolled in you will have a great view of the mountains!


Hole 15 Handicap 11
Blue 325 Yards Par 4
White 314 Yards Par 4
Red 237 Yards Par 4
Short par 4 up the hill. Tee shot requires a draw up the right side with the tree and hazard on the left. An accurate approach to the elevated green is required. Bunker guards the right front of the green, but the worse miss is left of the green with a fall off to the hazard leaving a tough up and down.
Hole 16 Handicap 3
Blue 348 Yards Par 4
White 333 Yards Par 4
Red 295 Yards Par 4
Another great par 4. Up hill all the way with hazard running up the left. The large tree on the left may force a fairway wood or hybrid to the right side of the fairway. Challenging approach to a two tiered green. Favor the right side as anything left will almost certainly mean bogey!
*A tee shot or approach shot may find the cart path on the right side. If the ball rolls backwards, back down to the tee box. Local rules allow you to replace the ball on the fairway just off the cart path where the ball reached its furthest point.


Hole 17 Handicap 13
Blue 747 Yards Par 6
White 692 Yards Par 6
Red 634 Yards Par 6
The famous 747yd par 6! The aggressive play is to take driver off the tee. This forces the player to aim right over the tree line to allow the ball to roll left off the bank to the fairway. A push to the right into the trees may mean 3 off the tee! A safer tee shot is hybrid into the fairway taking care not to go too far left. 2nd is played through the gap in the trees. The perfect shot shape is a slight draw as the fairway banks severely right to left leaving a difficult third if you find yourself high on the right side. The big hitters now have a chance to go for the green in 3, aiming left to cut off the dog leg to the green. The more strategic thinker will hit their 3rd and favor the left side of the fairway as the hole starts to dog leg right. This will leave a short iron approach to an elevated green. It may sound strange but 6 is a great score! A birdie 5 is something to really celebrate!
Hole 18 Handicap 12
Blue 375 Yards Par 4
White 360 Yards Par 4
Red 286 Yards Par 4
Almost home! Anything from a driver to hybrid off the tee for this dog leg right par 4 finishing hole. Hazard on the right, but too far left leaves a difficult angle for the 2nd shot over the tree. The approach is to an elevated and undulating green. Aim for the center of the green as the hole is guarded by a severe fall off on the left. Sink the birdie putt and another memorable round is in the books!
